This post contains affiliate links. Please see our disclosure policy.
Sunday Dinner
Brown Sugar Candied Bacon
Crab Cakes with Sweet Red Pepper Curry Sauce
Green Salad with Blue Cheese Vinaigrette
Peach Cobbler Ice Cream
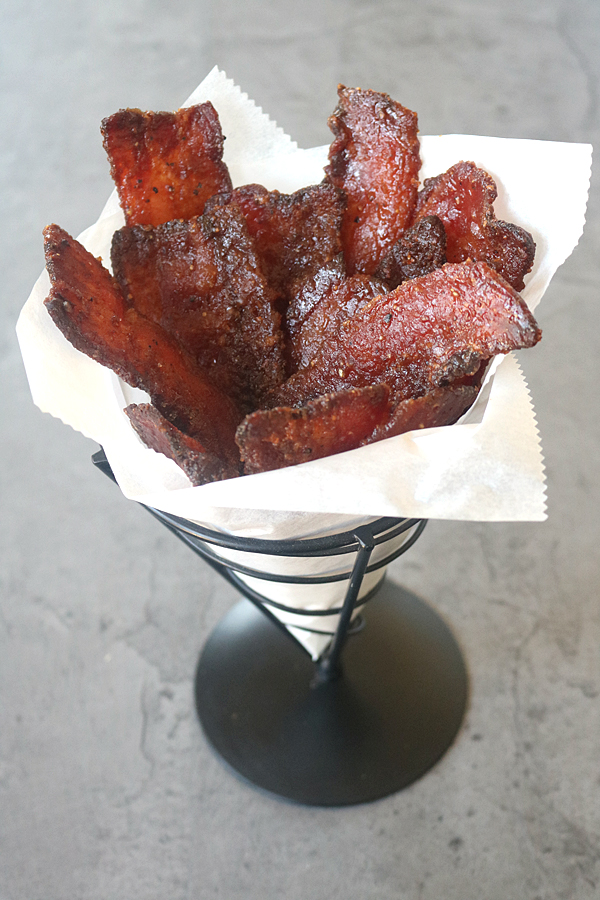
If you have never had candied bacon, you are in for a real treat! It is amazing how a few ingredients can change your life. Okay, it may not be life-changing, but it will give you a whole new perspective on cured pork belly. Candied bacon is smoke-cured pork that is enveloped in a “crust” of brown sugar, dry mustard, black pepper, and cayenne pepper for a nice kick. It is savory, sweet, salty, spicy, and totally addictive! It reminds me of the crust on an Easter ham, but it is much easier to prepare.
The most important thing to note is to use thick-cut bacon. Regular or thin-cut slices will burn to a crisp. Extra thick-cut bacon will turn out like beef jerky and will not crisp. I like to use a full-size sheet pan lined with foil. A full-size pan will be large enough to cook all of the bacon, and the foil will make for super-easy cleanup. When baked on the rack, the bacon does not need to be turned because the heat is evenly distributed on both sides. I use a low temperature of 325°F so the bacon does not curl when baking and the fat renders evenly. The baking time will vary slightly because not all thick-cut bacon is exactly the same thickness. Once the bacon is richly caramelized, transfer it to a sheet of parchment paper, and it will crisp as it cools.
We are enjoying candied bacon tonight as a simple pre-dinner snack, but there are so many other ways to enjoy it. It is a no-brainer for breakfast or brunch, but think outside the box and sprinkle it on salads, pile it on sandwiches, garnish Deviled Eggs, add it to a Parmesan Cream Cheese Ball, or jazz up some Guacamole! I have even been known to put candied bacon on cupcakes (that’s another story). The possibilities for enhancing a recipe or dish with bacon are endless. Ask yourself- what would bacon do? Happy Sunday!
“As an Amazon Associate, I earn a commission from qualifying purchases that you make from the links within my posts and recipe cards with no added cost to you.”
Brown Sugar Candied Bacon
Equipment
- 1 Full-size sheet pan with rack
Ingredients
- 1 pound bacon, thick-cut
- ¾ cup light brown sugar, packed
- 2 teaspoons dry mustard
- ½ teaspoon black pepper, freshly ground
- ¼ teaspoon cayenne pepper, optional
Instructions
- Preheat the oven to 325° F. Line a rimmed baking sheet with heavy-duty aluminum foil. Set a wire rack on top of the foil; lightly spray with baking spray and set aside.
- In a shallow bowl or pie plate, combine the sugar, mustard, black pepper, and cayenne pepper (if using), breaking up any clumps with a fork. Dredge each piece of bacon on both sides in the sugar mixture until thickly coated. Arrange the bacon on the rack 1/4-inch apart and sprinkle with any remaining sugar mixture.
- Bake for 45-55 minutes, rotating the pan halfway through baking, or until the bacon is richly browned and crisp. (You do not need to flip the bacon as it bakes.) Transfer the bacon to a sheet of parchment. paper and cool to room temperature. Bacon can be stored in an airtight container in the refrigerator for up to 4 days. Enjoy!
Notes
Nutrition
Nutrition information is automatically calculated, so should only be used as an approximation.