This post contains affiliate links. Please see our disclosure policy.

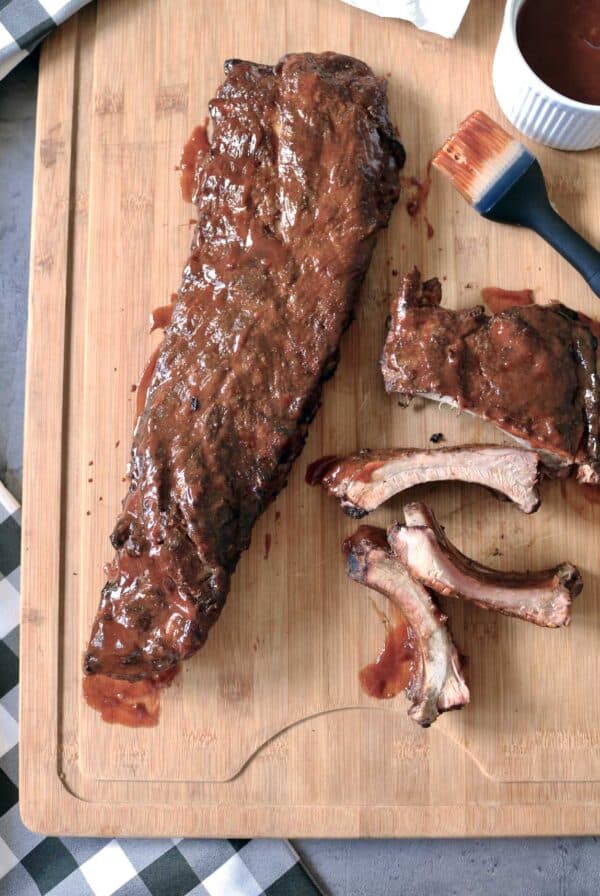
Every once in a while, I get a hankering for a good, juicy, deep-flavored steak. That is when I pull out this recipe. The original recipe used only the pan-seared method, but my steaks come out just as nicely when cooked on the grill (as pictured above) using virtually the same technique. Most of the time, I use it for strip steaks, but I get equally good results with a ribeye or fillet. What is important is that the steak is at least a uniform 1 ½ inches thick. Unlike cooking most of my meats, where I bring them to room temperature first, this method starts by cooking the steaks in the oven at a low temperature. This ensures that the steak temperature is even throughout. That way, you don’t wind up with a charred, gray crust and a cold, raw inside. We like our steaks medium-rare, but you can certainly leave them in the oven a few minutes longer for medium doneness. Immediately after removing the steaks from the skillet or grill, I take the flavor one step further and rub the entire surface with a clove of garlic, which really adds great flavor. Let them rest for 10 minutes, then….

slice open that perfectly cooked, glorious piece of meat. Pavlov could have used this picture for an experiment on humans (okay, those of us who do indulge in meat). It may cause a spike in drool bucket sales. If you are looking for an even deeper beef flavor, I have included a dry-aged technique in the recipe below.
“As an Amazon Associate, I earn a commission from qualifying purchases that you make from the links within my posts and recipe cards with no added cost to you.”
Thick-Cut Steaks Pan Seared or Grilled

Ingredients
- 2 boneless strip steaks, 1 ½ to 1 ¾-inch thick, about 1 pound each
- kosher salt and freshly ground black pepper to taste
- 2 tablespoons Extra-virgin olive oil
- 1 large garlic clove peeled and sliced in half
Instructions
For the Pan Seared Method
- Place oven rack in the center of the oven and preheat to 275ºF. Pat steaks dry with paper towels. Cut each steak in half vertically to create four (8 ounce) steaks. Season steaks liberally with salt and pepper. Place the steaks on a wire rack set in a rimmed baking sheet; transfer steaks to oven. Cook until an instant read thermometer inserted in the center of the steaks registers 90ºF to 95ºF for rare to medium-rare, about 20-25 minutes, or 100ºF to 105ºF for medium, about 25-30 minutes.
- In a large cast-iron skillet, heat the oil over high heat until smoking. Place the steaks in the skillet and sear until browned and crusty, about 1 ½ to 2 minutes, lifting the steaks halfway through to redistribute the fat. Using tongs, turn steaks and cook until well browned on the second side, 2 to 2 ½ minutes. Transfer steaks to a wire rack and reduce the heat to medium. Using tongs, hold 2 steaks together and return to the skillet to sear on all sides until browned, about 1 ½ to 2 ½ minutes total. Repeat with the remaining 2 steaks. Transfer steaks to a plate. Rub each side of the steak with the cut side of the garlic clove. Cover loosely with a sheet of aluminum foil and let rest for 10 minutes before serving.
For the Grill Method
- Place oven rack in the center of the oven and preheat to 275ºF. Pat steaks dry with paper towels. Cut each steak in half vertically to create four (8 ounce) steaks. Season steaks liberally with salt and pepper. Place the steaks on a wire rack set in a rimmed baking sheet; transfer steaks to oven. Cook until an instant read thermometer inserted in the center of the steaks registers 90ºF to 95ºF for rare to medium-rare, about 20-25 minutes, or 100ºF to 105ºF for medium, about 25-30 minutes.
- Prepare a charcoal grill for high heat with a cool area on the side; oil the grates well. Rub both sides of the steak with the oil. Place the steaks on the grill, close the lid, and sear until browned and crusty, about 1 ½ to 2 minutes. Using tongs, turn steaks and cook until well browned on the second side, 2 to 2 ½ minutes, jockey steaks as needed to prevent flare-ups. Transfer steaks to a plate and lower the charcoal to a medium heat. (If you are unable to lower the temperature by changing the charcoal rack position, use the outer edge of the fire for the cooking area) Using tongs, hold 2 steaks together and return to the grill to sear on all sides until browned, about 1 ½ minutes total. Repeat with the remaining 2 steaks. Transfer steaks to a plate. Rub each side of the steak with the cut side of the garlic clove. Cover loosely with a sheet of aluminum foil and let rest for 10 minutes before serving. Enjoy!
Notes
Nutrition
Nutrition information is automatically calculated, so should only be used as an approximation.
Oh! This steak is calling for me…I love steak and yours came perfect.
Hope you are having a great week and thanks for this tutorial 🙂
Nicole, I can ALWAYS count on you for something fabulous and this steak is no exception! What an interesting method of cooking steaks – I think I will try this for my husbands birthday dinner! Thanks!
Chris,
Thank you and you are welcome:) I hope you and your husband enjoy it!
What a way to make steak, am printing this recipe and preparing it this weekend, just hope it'll turn out like yours, your pic got me drooling 🙂
Ali-
Thank you:) I do hope you enjoy the recipe/technique. It has been fool-proof for me.
Absolutely mouthwatering!
Great blog. What are the benefits of putting the steak in the oven 1st and THEN searing on the stove top? Most of us (classically-trained chefs) do it the other way around: sear THEN finish in the oven. Just wondering if I'm missing something. Thanks.
Anon-
With large roasts I sear the meat first then put it in the oven to finish cooking as well. This method,however,ensures that the meat is evenly and beautifully cooked through out in a cool oven, then it is quickly seared creating a nice brown crust with no gray meat underneath and the rest of the meat stays pink and juicy.
Tried this method tonight with thick top sirloin cuts – – worked perfectly!! I will be saving this. Thank you!
Taylorbee-
I am so glad you enjoyed steaks and technique:) Thank you for letting me know. Best!
Hi Nicole, Your Thick-Cut Steaks Pan Seared or Grilled recipe has been selected to be featured in a Recipe Guessing Game. Please share the following link with your friends and fans. To play, go here: https://knapkins.com/guess_games/169?source=blog Congrats again!! 🙂
Ok, this looks amazing! My only question is, what if the steaks are terribly thin? We thought we were doing a good thing by buying some boxes of frozen beef in different cuts. Great, other than everything is literally only 1/2 in thick. How will that change the cooking time? Will it change the flavor? I'm dying to try this but I've got to use this meat before it goes bad. Thank you!
Me-
1/2-inch thick is pretty thin and not advisable for this recipe. However, you might try it this way– set the steaks out at room temperature for at least 1 hour (this allows the steaks to cook evenly without gray meat). Prepare your grill or pan, reduce the cooking time by half or less for each side (depending on how you like your meat done) . Brown on sides, rub with garlic, and allow to rest. Worst case scenario– slice the meat against the grain and serve the slices in a sandwich. Look at my recipe page for Italian Steak Sandwich:)
Nicole – Do you think this method would work for thick boneless pork chops? We like them with a crusty seared outside and tender inside. I always have trouble getting them right and wondered if this method would be worth trying.
I have not tried it only because pork needs to be cooked to a proper temperature (135° F), not medium-rare to medium.
Thanks for answering 🙂
I've been enjoying this recipe since it was first written in Cooks Illustrated back in 2007!
Your article was amazing